Camera Shooting and Exposure Modes ExplainedCameras have a multitude of camera shooting modes and settings which can be confusing at first. Once you know what they mean they are very easy to use and this guide shows you how.
This article is part of a series of articles. Please use the links below to navigate between the articles.
- Introduction to Photography Course - Definition & Types of Photography
- How Cameras Work and Terminology Explained for Beginners
- What is the Exposure Triangle and How Does It Affects Exposure?
- Understanding Camera Shutter Speed for Beginners
- Aperture and Depth of Field in Photography Explained
- What is Digital Photography ISO and Grain?
- How to Understand Camera Lenses and Focal Length
- Essential Photography Composition Rules To Improve Your Photos
- Camera Metering Modes Demystified - Which One To Use
- Camera Shooting and Exposure Modes Explained
- Complete Guide to Flash Photography for Beginners
- When and How To Use A Camera Tripod In Photography
- What Are White Balance And Colour Temperature Camera Settings?
- How to Use Camera Histograms in Photography for Perfect Exposure
- Master These 10 Camera Settings For Your Best Photographs
- Why You Should Be Shooting in RAW - Reasons and Benefits Explained
- Essential Photo Editing Techniques to Enhance Photographs
- Complete Guide to Macro Photography for Beginners
- Beginners Landscape Photography Guide for Stunning Photos
Choosing the correct camera shooting modes gives you the freedom to start concentrating on taking great shots. Your camera will offer several automatic settings, including modes that help you shoot action, closeups and portraits, which offer a compromise between full auto and full manual.
Get to grips with your camera's semi-automatic and manual settings and you'll soon see an improvement in the results.

The camera shooting modes are often called camera preset modes as well. The camera shooting or preset modes are pretty much the same across all camera types and makes. They are generally accessed using the mode selection wheel. Some of the common modes are explained below.
Common Camera Shooting Modes and Preset Modes
These are the common camera shooting modes found on most Canon cameras. Other manufacturers may use slightly different symbols or abbreviations, so check your manual if you can't locate a mode listed below.
Canons A-DEP mode is an automatic depth of field calculation. To use the function simply pick a point in the foreground, then pick a point in the background, then refocus one more time and take the picture. The camera will work out exactly what aperture setting you need to use to get everything in between those two points in focus.
(Manual) - In this mode, you have complete control over all settings. You must work out the balance between shutter speed, aperture and ISO.
(Aperture Priority) - In this setting, you control the aperture and the camera will work out the shutter speed and ISO to get the correct exposure. This is useful for controlling the depth of field and not worrying about shutter speed.
(Shutter Priority) - In this mode, you control the shutter speed and the camera will calculate the aperture and ISO to get the correct exposure. This mode is useful for controlling the shutter speed for example capturing motion or freezing motion.
(Auto) - In Automatic mode, the camera will make a best guess at what you are photographing and adjusts the settings accordingly. You have no control over the settings. Your DSLR is effectively a point-and-shoot camera, with all the settings taken care of.
(Program Shift) - Similar to automatic mode, but allows you to change some of the parameters. As you adjust the shutter speed the camera adjusts the others, and vice versa. Automatic mode does not allow this.
(Portrait) - The camera increases aperture to blur out the background and balances ISO and shutter speed to give an effective portrait image.
(Landscape) - In landscape mode the camera will select a narrow aperture to maximise depth of field increasing sharpness of the landscape around.
(Macro) - Similar to portrait mode, macro mode opens up the aperture and allows close focusing. By controlling the shutter speed and ISO, the camera will try and calculate the best exposure.
(Action) - In action mode the camera will try and work out what settings give the fastest possible shutter speed to capture action shots.
(Night) - Night shot mode the camera will increase the ISO and open the aperture as wide as possible and decrease the shutter speed to try and capture night or low light portraits without the use of flash.
(No Flash) - No flash mode functions like automatic mode, except that at no point will it attempt to use flash. This is particularly useful in situations where flash is not permitted such as museums or galleries.
Let's have a more detailed look at the four most useful camera shooting modes - auto, program, shutter priority and aperture priority.
Auto Exposure Camera Shooting Modes
Auto exposure mode is the one most people use and is the default mode for all cameras regardless of whether it is a smartphone or DSLR. In this mode, the camera's software fully controls all aspects of the photograph, from the shutter speed to the aperture setting to the focus. If you are starting in photography there is absolutely nothing wrong with using the automatic mode, despite what other people may say.
While it is true you may not have the same creative control over shutter speed or aperture automatic mode does a very good job of guessing what you are photographing and adjusting the settings itself to suit the scenario. This allows you to concentrate on more important things, like composition.
A step up from automatic mode, if your camera supports it, are the scene selection modes. These are typically preset modes for landscape, portrait and macro. These are automatic modes, however, when you select landscape the camera will be trying to reduce the aperture to maximise the depth of field. In portrait and macro, the camera will try to make the aperture as wide as possible to create a nice background blur or bokeh.
Shutter Priority (S or Tv) Mode
Shutter priority is the first of the semi-automatic modes we are looking at. In this mode the camera allows you to select a shutter speed and it will adjust all the other settings accordingly to get the best exposure.
You can use this mode to control shutter speed, from long exposures where you capture the motion of your subject through to very fast, freezing the subject's motion.
Shutter priority is especially useful for subjects like sports and moving animals as it gives you sharp images freezing the action. On the other end of the scale, you can set a long shutter speed to blur the motion of waterfalls or create a timelapse.
Shutter Priority is commonly abbreviated to Tv on camera settings. Tv stands for Time Value and is the old name for shutter speed dating back to film cameras.
Aperture Priority (A or Av)
Aperture priority is similar to shutter priority, however, in this mode the camera allows you to control the aperture. You can open the aperture to create pleasing background blurs or set a narrow aperture for landscapes. The camera will automatically adjust the other settings to get the best possible photographic exposure.
When the light is good, you don't need to worry about motion blurring in your photos. The shutter speed is always going to be fast enough to eliminate camera shake and motion blur. You are then free to play with the aperture settings to control your depth of field and make your photos as sharp as possible.
If you are shooting portraits, aperture priority will allow you to open up the aperture to create a more pleasing blur in the background whilst the subject is in sharp focus.
You shouldn't use aperture priority in low-light scenarios, where you may think you'd need to make the aperture as wide as possible. This is because the camera may still set a shutter speed too slow to eliminate camera shake. Instead, select shutter priority yourself and the camera will automatically adjust the aperture and ISO to compensate.
Program Mode (P)
Automatic Program Mode is partway between full auto and priority modes. The camera still retains some control of the settings, however, you get more control than in full auto. The camera lets you set the ISO and then works out the shutter speed and aperture. It then lets you change these two settings to get the results you want.
Normally this is done with the control dial. Rotate it one way and the shutter speed increases whilst the aperture decreases. Turn it the other way and the shutter speed decreases and the aperture increases.
As an example, you may be shooting outdoors. You select an ISO of 100 to keep noise to an absolute minimum. The camera will select the best settings it thinks are appropriate, but you may want to photograph your subject with a background blur. You can use the control dial to widen the aperture a bit and the camera will adjust the shutter speed accordingly.
Alternatively, you may wish to adjust the shutter speed to freeze motion or blur a waterfall. By using the control dial you can adjust the shutter speed and the camera will adjust the aperture.
These two settings are linked, so as you turn the wheel one goes up and the other goes down. Simply keep an eye on the one you wish to change.
In Program mode, you can also set parameters within the Program like white balance, metering mode (full/centre/spot), select which focus point to use, and even tell your camera to use the flash or not. We'll see these settings in a future tutorial.
Manual Mode
Manual mode is often touted as the king of camera shooting modes, something to aim for, like achieving ultimate enlightenment, and that you are not a proper photographer unless you have mastered manual mode.
Rubbish I say.
Manual mode is just another tool at your disposal. The secret to mastering manual camera shooting modes is to know when to use it, and when not to.
In manual mode, you take full control of every setting. The camera will not try and adjust or compensate for anything. It is all up to you.
This can seem intimidating to new photographers, but by keeping a few simple rules in mind you can master manual mode.
Shutter speed, aperture and ISO still function in the same way to control the exposure so as long as you understand the relationship between them the rest is easy.
When to use Manual Mode
Manual mode is most useful when you cannot use any other mode or the camera finds it too difficult to work out the settings. These are typically for long exposures or very short, such as astrophotography or night-time photography. The camera does not have enough light to evaluate the scene so it cannot give you any settings to use.
Manual mode is also essential when you want to achieve a specific creative effect, such as the light trails from cars over a long exposure, or the motion of the sea in rock pools. While you can use the shutter priority for these, the camera will not set the best settings for these specific scenes. The camera can only take the best guess at what you are trying to achieve, only YOU know what that is.
If you are photographing sports in an indoor arena then the manual mode is very useful as it allows you to set the shutter speed to freeze the motion, the aperture to blur the background and the ISO to reduce the noise. In this scenario, the lighting is not going to change so you can be confident of getting a consistent exposure each time.
If you're shooting in a studio with strobes and flashes manual mode is the only one you can even use. We'll cover studio work in a later tutorial.
When NOT to use Manual mode
Using manual mode takes time. You must set each setting correctly and unless you can accurately calculate the required exposures and adjust the settings for each shot in a fraction of a second, you risk losing an opportunity. For landscapes, this isn't too much of an issue as the hills are not going anywhere, but for wildlife, action, candid or any other subject that can move it's best to switch to a semi-automatic mode.
Manual mode is also affected by changes in lighting, meaning you have to compensate manually for each change or you risk over, or under, exposure. Imagine you are outside and get the exposure setup for a sunny day. As you take photos a cloud goes past the sun. All of a sudden you're massively underexposing because you forgot to increase the shutter speed. Auto or part auto camera shooting modes will take this into account, but the full manual is for you to remember to apply the right settings.
Exposure Lock Function
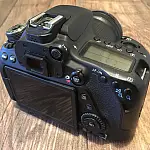
Exposure Lock, or AE-Lock, is a small button located on the back of the camera body which most people have never pressed. This button allows you to lock in an exposure value until you press the shutter.
On Canon cameras, the AE-Lock button is indicated with an asterisk (*) whilst Nikon uses AE-L as a label.
Normally when you move the camera around it is constantly metering the scene and adjusting the settings. You can see this by watching the aperture and shutter speed and pointing the camera from light to dark areas. You'll see these values adjust for the correct exposure.
You can also activate AE Lock by pressing the shutter button halfway down. This will also lock in focus and start image stabilisation as well.
AE-Lock is very useful when you use spot or partial metering. The centre AF point takes a meter of your subject and focuses on it. The problem is you want to reframe your photo to place the subject off-centre. As soon as you move away from the subject the camera re-meters the scene and now your exposure is off. When you press the AE-Lock button, it freezes whichever exposure parameter was set by your camera until you take a picture. Now you can move around and reframe your shot without affecting exposure.
What is Exposure Compensation and How to Use It
Exposure compensation is used to alter the exposure from the value selected by the camera, making photographs brighter or darker. While the metering modes work quite well in most cases, you might experience overexposure or underexposure in more challenging lighting conditions. Photographing in strong shadows, or with a backlight, the camera meter might be adjusting the exposure too aggressively. This is where Exposure Compensation comes into play and you can manually take control of the brightness using the exposure compensation feature.
The method by which you adjust the exposure compensation varies by camera make and model. While most cameras will have a dedicated button on either top or the back of the camera, some cameras might have this feature available only through a dial or a menu screen. In any case, look for the plus/minus icon or consult your manual for further instructions.
The steps here are for Canon DSLRs, however, once you find the method for your camera the principle is the same.
The next thing you need to locate is the exposure meter in the camera's viewfinder or screen. This usually looks like a scale between -3 and +3 with indicator markers which you can see at the bottom middle of the photo below.

On Canon cameras, the exposure is adjusted by half depressing the shutter and then scrolling the command wheel on the back. As you start making adjustments to your exposure through exposure compensation, you will notice a bar going to the left or to the right of the middle 0 value, which indicates that you are dialling in negative or positive exposure compensation.
How to Use Exposure Bracketing
Exposure bracketing is a technique in which a series of photos are taken, one underexposed, one normally exposed and a third overexposed. Exposure bracketing is useful for tricky lighting conditions where you need shadows and light areas to be exposed well without the other being clipped. An example of this is HDR photography, where the camera automatically blends these frames to make one evenly exposed photo. Exposure bracketing takes three photos in quick succession and allows you to blend them in post-processing.


